Wednesday, April 25, 2018

Pfaffin' it part one.

The first thing I did with the Pfaff 130 was nothing. I began by finding an owner's manual online in an effort to find a lubrication diagram. apparently I am not alone in this matter and a free pdf was easy to find. As I began to oil the machine there's always a point where it's best to just let it soak. That's when I began chasing down the wires to make sure everything was okay.


When the machine arrived, both the motor wires and the light wires were disconnected from the terminal. Since the insulation on the motor wires were okay, I figured I'd need the motor before the light. The other thing I would need was a foot control since there wasn't one. After rounding up a pedal, I sat down to figure out which wire went where. It looked simple enough since I've had experience with the same sort of three post terminal on many of the vintage Singer machines.


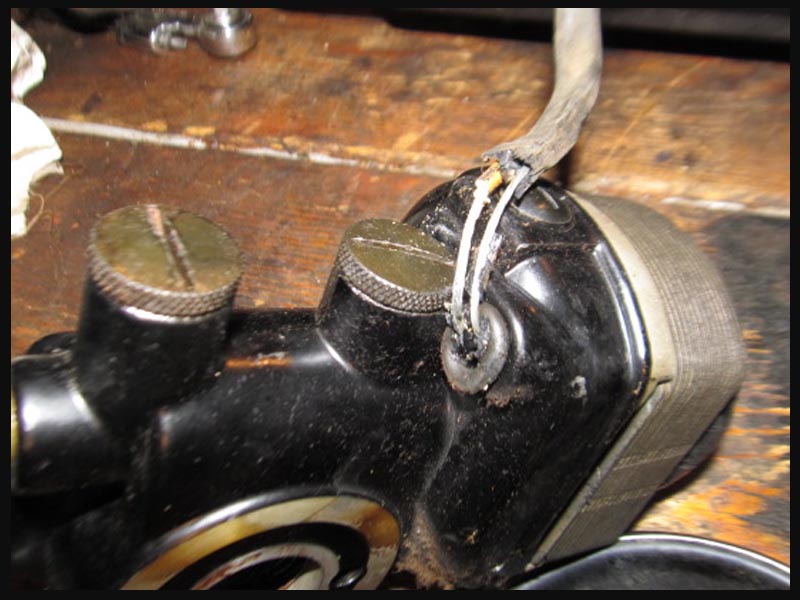
 Note the wire terminal here 
mounted on a bracket and connected to the motor bracket bolt.

Although schematics and wiring diagrams appear a tad complex, the wires for an older sewing machine such as this Pfaff have become rather simple to me. The light on this machine, and many others, is a two wire affair. One single strand of wire brings electricity to the light, the other carries it away, or at least that's how I look at it.

Sometimes the light has it's own switch built in, other times the switch is located elsewhere. The switch is an interrupt for the current: throw it this way and the current is allowed to travel to the light bulb, throw it the other way and current isn't allowed to travel to the bulb.


If you can imagine that, then essentially the foot pedal (or knee control) is nearly the same as the light switch diagram.  When there is no pressure on the foot pedal, current is not allowed to flow - the switch is closed. When there is pressure, current is allowed to flow and the switch is open.

The difference between the light switch and the foot pedal to me... is like the same as a house light switch or a house light dimmer. The simple switch is either on or off while a dimmer controls the amount of power to the light. In theory then, the foot control behaves like a light dimmer (or rheostat) in the room of a house. The word rheostat is used for both mechanisms.

So power goes along one strand of wire into the foot pedal... then it comes out the other strand of wire (if the pedal is depressed) and this one strand then goes to the motor. Power then exits the motor on the last single strand of wire on it's circuit and goes back to the electric plug: electric in, and electric back out. Makes some kind of sense to me.

In many ways the circuit for the light with a switch is the same circuit for a motor with a pedal. What the common vintage sewing machine electric terminal does... is allow for these two individual circuits to get power from one source: the cord with the plug that goes into the wall socket. So the terminal acts as a place to connect two separate routes.


Where it becomes complex in my head... is the number of wires involved. There are only the normal pair of wires that come from the wall plug, and they enter the terminal box where they are then split into two. With the motor circuit, the 'power in' line has to travel through one side of the pedal, out the other side, and then to the motor, through the motor, and then back out and to the 'power out' line of the terminal that will return to the wall socket on its one strand, just as it came in on the other.

This is probably an over-simplification on my part, but it works for me. Ask me how to wire a light switch at this end of the hallway, and then that end, for the same light bulb in the middle... and I'll have no idea.  Even as I sit here and type this, the sewing machine sounds simple enough: two wires. One carries power in, the other carries it out. Everything you need to have power to must lay in between, and have a line in, and a line out. If it were that simple then why are there six wires to a sewing machine and three plugs on the terminal?

Oh my. The easy circuit to explain are the two wires for the light. Power-in goes to the light along one wire and power-out comes back. Often, there's a switch along the power-in line. That's it.I can therefore eliminate two of the six wires in my head. I know what they do.

The foot (or knee) control is what adds all the complexity. The reason it's a little confusing is because the control is way over there... and the motor and power source- are way over here. The third post on many of the vintage sewing machine terminals is simply a place for a splice in the wire. That's all it does. The third post connects the one single wire that is carrying the power away from the pedal... to the single wire that will now take the power and send it to the motor.


It's this way on the old Singer three wire terminals, and after examining the three post connector that was on the Pfaff, the theory appeared identical. Here's the Singer above. The thing to note on the Singer is that the splice is on the middle post. The middle post connects the one wire that is coming from the pedal and going to the motor.

Yes, I know. This might be boring.

Many people would rather not learn anything new and just hand it over to a trained professional. I wish I had the luxury, but I do not. If it needs fixed, I have to learn how to fix it, and there is a reason why I'm mentioning all this.


On all of the old Singer three post terminals the terminal for the pedal-out wire to connect with the motor-in wire is the middle post. This is not the case with the terminal that came with the Pfaff. By all appearances the terminal box on the Pfaff seems authentic and original to the machine, but the order of the wires is NOT the same as the Singer.


Needless to say, I had it wired wrong the first time and blew a fuse. 
The wires above are in the correct order, but I'm not finished with them yet.
(Also, minus the light wires)

This made me step back and carefully examine the Pfaff plug. I got out a magnifying glass and it didn't take long for me to correctly locate the pedal/motor splice post and now, I feel a need to show everyone what I learned since mistakes can be learning tools. Oddly, I searched and searched and couldn't find a single reference online to how to wire this terminal. So maybe we're breaking new ground here.

The splice post for the pedal wire -power out- to connect to the motor wire -power in- is the post marked #3.

Anyways. after figuring out which wire went where I tested out the motor. This too is an interesting dilemma. Pfaff's are known for their tight tolerances when it comes to manufacturing. The problem with tight tolerances is that since there is even less space between metal surfaces than other machines... they usually need oiling a little more frequently.

If they are not oiled more frequently, or not at all for awhile then -as with many older machines- oxidation and rust can begin and the machine may begin to tighten up. The original Pfaff 130 had two things going for it: the first was a detailed oiling procedure, and the second was a very beefy 1.5 amp motor.  An extra beefy motor will spin a machine that may have one little spot that's still not letting the oil soak in as far it should. Sometimes allowing the machine to spin will actually assist the oils ability to seep into that spot.

I had the Pfaff mechanisms spinning fairly free by hand when I wired the motor and pedal and decided to give it a try. The hand wheel would not take off running no matter how hard I pressed on the pedal. I still had to nudge it to go. The machine did spin and it spun well, but the original 1.5 amp motor had been replaced with a 1.0 amp unit, and I could tell.  I have since taken this motor apart, checked the brushes, cleaned and serviced the motor to the best of my ability... and it still has trouble turning a slightly sticky Pfaff. It will do for now... but either the machine still needs to loosen up a little more or perhaps a different motor should be considered.

All that being said, the machine really does shows signs of life.  I feel right now that there's a couple of spots that are a little thirstier than others when it comes to machine oil... and hopefully that will be rectified soon. It could probably sew right now if I asked it to... but I don't really think it's ready yet. When I finally get that one little rough spot out of the rotation (oddly right at the very tippy top of the thread take-up lever movement) then I'll be far more certain that the machine is ready to take the next step.

Until then...


Sunday, April 22, 2018

Completing the Potted Motor set

I shouldn't have been surprised. The 15-91 that has been threatening to appear finally came... the day after the first 15-91 found its way to my work bench. It seems as though just about the time I feel as if I'm on top of all this... I end up getting behind.


The first 15-91 on the work bench: a 1946 model.


Here's a subtle clue for any aspiring vintage sewing machine fan. If your new old machine arrives with a wooden spool of thread on the spool pin... chances are... no one has sewed on this machine for a long time.

Hint 2: If the machine arrives and the bobbin is stuck inside the bobbin carrier because oxidation is beginning to form a light sheen of rust on the inside of the bobbin carrier... then the machine has probably not been run for a really long time.

This is important.

If the machine has not been run in a very long time (and there could be a host of reasons) chances are there might be a problem with the machine. That's one of the reasons why people stop using things. I know these signs are subtle, but they can be very telling. Consider them warning signs. Obey the first cardinal rule of vintage sewing machines and never just plug the machine in to see if it works.

There was a very good reason why this machine has not been used in a long time:


Those are bare wires. They run from the Singer wiring junction and go up into the motor. They were not made that way. The wires should have insulation. Plugging this machine in could have caused an electrical short. Always check all of the wires, and always run your tests from at least a fused power strip if not a ground fault interrupt (GFI) - or both! And, just like with the Cylon Kenmore, it's not always just the motor wires - check all the wires.


I managed to solder in new leads within an hour. 
I like to know that the machine will run before I spent another minute cleaning and detailing.


Hand wheel removed.


Motor assembly removed from body.


Better picture of the bare wires.


Old wiring ends removed as insulation crumbled away.


New leads cut, stripped, braided onto the old, and soldered.


After all that, I did the shrink tube, tied the underwriters knot, and put things back together. Then I set the fused power outlet and began the process to test run the machine. It was turning freely and only a drop of oil here and there seemed appropriate. Once everything was in place, I flipped the switches and got - nothing. That's always a little worrisome. The first thing that goes my head is: What did I do wrong? As I sat there going over every step I realized that the one thing I hadn't checked was the power cord that came with the machine.


In the photo above, directly below the plug one can see where one of the two wires from the power cord had been pinched and broken in half. This is probably a good thing. It's possible that electricity would never have reached the bare wires of the motor if some one had plugged it in using this cord. Fortunately, this is the very old style of junction plug. I can unscrew the Bakalite halves and install a new cord. For the time being, I found a much newer cord and resumed the motor test.

With newer cord in place, the 1946 15-91 came to life and then it put up a little more of a struggle before sewing. The needle needed to be correctly set and the machine properly threaded (right to left) and away it sewed! Now, I feel as though I can afford to spend the time cleaning all the bits, retracing some steps with proper long-term maintenance, and fixing the light assembly.


The second 15-91 (above) came in the very next day, and although the type 40 table (version 4) certainly needs some work (photo of the old power cord was taken on the cabinet's top surface - yikes!) the machine itself, although  threaded incorrectly upon delivery, sews just fine, and it's a true centennial! It was actually made in 1951!  This machine sews just as well as it's older sibling.

Another green one:


Along with the 15-91s came another green Kenmore 158 machine.  It appears at first to be an identical twin to one already in the garage, but after checking carefully, the 'new' one is a model up the line. One is a Kenmore 158.15030 and the other is a Kenmore 158.16520. The second arrived with a full attachment case and cam set. I can't wait to see if it sews as well as the other. The first green Kenmore (16520) runs smooth and quiet and it sets a delightful stitch. It's a joy to sew with and not very unlike the Necchi BU. It will be interesting to see if the 'better model' can out perform the so-called 'lesser' one. I really do doubt it, but we will see.

Finally, and perhaps almost prophetically... the first 15-91 arrived with a second all-black machine. It's beginning to feel ominous, as if the portends are warning me. I always said that if perhaps I had a chance to play with a 15-91 and a Pfaff 130... that I might have to move on from sewing machines to something else.

So, of course, they arrived together.


I get the feeling though, that this is going to be a whole new learning curve. The number of oil points from the operators manual are astounding, and the machine's hand wheel is very stiff.  This is going to take awhile, but I believe it's going to be worth it. At least I imagine it's going to be worth it. It certainly is a marvel to behold!

This is not my machine. It's owner is betting I can get it going. They have some funds wrapped up in the piece and I agreed to take it on for the experience.  It's definitely going to be something new - and I'll let you all in on the experience as it happens.

Thursday, April 19, 2018

The Star Cabinet


Having managed to tame the Cylon Kenmore 117.740, the machine was moved to a portable box. It was pretty obvious that the starry painted cabinet was not its original home, and moving to a portable means a lot less wear on the wiring in the front of the machine. This left me with an empty universe...


A friend kidding me about the paint job; wondering why anyone would do that.

To me the answer was obvious.

I said: Probably to hide the water ring...

It wasn't as bad as I feared.

The cabinet itself appears older, as well as the wiring. I'm also sure the machine cut-out has been altered once since the round circles are there for a single screw pivot pin.  When I began to clean off the paint in the back, the color of the wood underneath seemed very inviting... and so began several days and many sheets of sandpaper. I do wish it would stay warm outside...  sanding by hand creates a lot of dust.


Galaxy after galaxy faded from view and the original wood underneath showed the most interesting red tints. Even the original shellac finish didn't really bring out the tones - it just covered them up. I began to suspect some of the wooden pieces may have been made from cherry... but the surface was too forgiving. It's not a Maple, nor do I believe an Oak, and I began to consider a Red Elm... which would be very unusual. When's the last time you saw anything made with red elm?


It was enough of a mystery to keep sanding until a beautiful wood emerged!


It's during these stints of somewhat mindless manual labor that my thoughts wander off and consider what an eclectic group of people vintage sewing machines gather. There are historians, collectors, sewers, and life changers. The people involved are often as fascinating and diverse as the different machines, and there are so many.  Just adding up all the current local listings on different classified online programs I'd bet there's well over three hundred different sewing machines available. It makes me wonder who the people are that buy them! I'm also very glad to see that some are getting a home and I know that many are not.


I received a call today asking me to come out to Mount Lebanon and rescue a machine. The lady had searched the internet for local ways to recycle a sewing machine in Pittsburgh, and couldn't find one. Even the townships and municipal organizations that claimed to take electronics for recycling... wouldn't take her machine. It's a good thing she found me - and even then, I can't save them all. I don't have the space...


Even more unusual to me is the sliding scale of popularity in the used machine market. Some older ones retain value while other perfectly good vintage machines slide off the bottom. Quilters are still buying Singer featherweights (models 221 and 222). Prices for a nice one have many people turning toward the reliable, slightly heavier, and less expensive model 301. I have a local expert on restoring these models, which is nice when I have a question or need a part.

Newer working machines with a walking foot are also models that have retained value, along with the real antiques: the Wilcox and Gibbs, or Wheeler & Wilsons or even a lotus flower decal Singer.  Some manufactures are more popular -right now- than others, esp when it comes newer offerings like: Janome, Pfaff and Bernina.


This is all great as far as I'm concerned. Good to see machines finding homes and people still sewing, but it still leaves a lot of the older machines looking for a purpose. The domestic sewing machine, once a household item, is slipping into the past. The older (and far more reliable in my opinion) all metal heavy weights of yesteryear are having trouble finding owners.


My efforts to try to save some of them meet restrictions as well.

There's a list of requirements that many foreign countries have for sending them machines. Some don't have the access that we do to certain bits and bobs. Some countries will only take class 15 machines, others do not want a machine that takes cams, others yet will not accept Touch & Sew models, and some have very specific weight restrictions.

It makes things... interesting.

I have a friend who is very specific with restorations and could probably redo a vintage Necchi Supernova in her sleep... but finding a buyer for her beautifully cleaned and serviced machines is sometimes difficult.  Many people do not know that these sixty year old machines are showing no signs of slowing down,  or that a well restored unit will probably last another lifetime, or two. Let me know if you need one.


And then I know others who have spent months trying to find just such a machine. (Congrats to B. She finally found one, and it's a beauty!) Unfortunately the market in many parts of country is not as saturated as it is here.


And it's not just the old Singers and Necchi machines.  There are collectors for the colorful Japanese made machines of the 50s and 60s, and many younger people are actively searching for 'energy alternative' treadle powered machines - even ones that can do more than a straight stitch - which is an very interesting blend of the new and the old.


I'm thinking perhaps this Japanese made Nelco will look really great in the Star Box. The colors are so close!

My sisters interests in older machines are specific to the projects she needs to sew - many involving thick layers of heavy material that often strain newer machines to a breaking point. And yet it was this interest that got me into re-doing these machines to begin with, and this same interest that makes me question my own actions.

It often comes down to making a choice. There are machines that cross my bench that I can save, but I'll have trouble finding them a home... and others that have enough market value that I really should consider selling the piece so I can invest the funds for parts for the other machines. There are still four Singers under the work bench that need top gears, and now two more that need new power cords... and sometimes I look around and think I should sell one... so that maybe I can save eight more. It's a moral quandary, and I often find myself wrestling with what I feel may or may not be the 'right' thing to do.

Then... every now and then I find myself thinking about a green yard sale Mira and a wreck of a 101... and how I personally would like the chance to restore them and maybe use them for a little while... and yet even that idea is sometimes fraught with a touch of guilt. At least I can talk about it. Say it out loud.


These two seem worthy of saving, but at fifty each? It's difficult to justify the costs of my time and parts.  And really, what do I have in the end? A machine worth more than the market will allow - even if it sews like mad.

And then there's all the bits and bobs to sort through...


 Oh geez... I wonder what these go to? 

Wednesday, April 18, 2018

Evil Twins!

Within the course of a week... eight machines came in the door, which makes things interesting, and hectic, and crowded and not always on goal, but always entertaining. What I didn't expect, were the twins... three sets!

The first pair:

came in together: two Singer model 66s.


The first was older, dirtier and had no reverse. It really does appear to have once been a treadle machine (the five inch long piece of leather belt still attached to the hand wheel groove was a clue) but it has a motor boss... After a very good cleaning which involved taking apart the bobbin winder to sand off the rust, and then a somewhat crazed search for a motor. (Can't believe I'm out of motors!) The first 66 came to life and laid down a great stitch.


The younger 66 has reverse but it also came with the oddest looking finish. It's almost as if it were a crinkle finish - but not quite. The serial number says it was made during the period when Singer did do the crinkle (or Godzilla) finish (1941 to 1953) but research also indicates that those machines were never originally adorned with a complicated decal set.


This one has deck and post decals and it's not the normal simple set you might expect on a crinkle. I believe perhaps the machine was stored somewhere that exposed it to some sort of air borne coating. After several hours of trying every manner of soft cleaning method, the wide surfaces cleaned to the original smooth paint finish, but the layer of whatever it was exposed to is so embedded into the surface that I can't clean the decals for fear of rubbing them off.

So in this case, the younger nicer twin became the more tedious and evil one even though it sews just as well.... It now appears that I have only two choices to 'pretty up' the machine; either attempt to level a coat of clear poly to the dirty decal height... or rub off the decals entirely and buy a new set. Oh my!

The second pair:


Then came the 401 twins, and for awhile I wasn't sure which was naughtier. There was a brief period of time when neither of the two would sew...  and some of that was my fault. It's embarrassing to have to admit this, but it happened. I had everything on the machines set correctly... but had accidentally installed the new needles backwards. Big duh on my part. Once I got that straightened out one of the two sewed right away.

The other has yet to sew. I've checked everything including needle height and timing and the hook is just refusing to pick up the thread. I'm going to have to start all over at the beginning with this one and try again. It really does feel as if it should sew... and it's really close... but it just hasn't happened yet, and there's a few scars on the hook, and I can hear the needle touching... so it's me. I haven't found the right adjustment.


The funny thing (?) is that I had just given away my last 401 the day before these two arrived.  I suppose I shouldn't say 'given' exactly. A friend of a friend has a cabinet machine and no room for it in his apartment. He was looking for a reliable portable.  I'm supposed to pick up his old cabinet machine this weekend.... so I suppose it's a trade, but until it arrives... I can't say I traded.


This leaves me in a spot. I have two good sewing machines that need to go. I don't usually do this, but each one probably has enough market value left that if I sell them... I can buy the parts I need to fix eight more. It's a trade off, and I don't feel great about it,  but I have to think about the eight more working machines. I'm splitting up the twins. The working and sewing 401 machine along with it's nearly full attachment case are available. And there's a beautiful Singer 201 in a type 40 table that's also available.


The third pair:

Two Necchi BF flatbed Supernovas;
one pretty in pink,
the other not-so-much.


These were the easy ones?

Perhaps easier... The pink had issues. The first of which was a dull needle and when I went to replace it, I got a real surprise. The thumb screw for loosening the needle was missing! After a detailed inspection and my curiosity at wondering why the old needle didn't just fall right out... I found that only half of the thumb screw was missing. It had broken in two... and the only half available to me was stuck deep into the shaft.


Somehow I got lucky and the broken half in the shaft turned, and soon I had it eased out and in my hand. The problem now was to find another one... and again I turned to one of the two Sylvia's with bad cam stacks and 'borrowed' a piece. The Sylvia screw fit perfectly in place. With a new needle installed, then I had to fix the pressure foot indicator arm. Somewhere along the line the door had been forced shut and the arm was badly bent.


That took a long pair of needle-nose pliers and a very deep inhale... while I prayed it didn't snap. I probably should have applied some heat... but it went back with very little pressure and no issue. Whew! Now that I could close the front compartment door, and that the machine could hold a needle in place... my attentions went to the wiring.

There sure was a lot of electrical tape...


And yet, after unfurling a few feet, I found that the tape was doing its job. The wires were safe, and better yet... it was only just the wires and the junction box and wiring to the machine were fine.  I plugged everything in, and since I'd oiled the machine the night before... Pretty in pink zoomed straight ahead and set a great stitch. The only problem -if you want to call it that- with the other BF was a lack of power cord. I borrowed the one from Pink, plugged it in... and it gave me nearly the same stitch. These two twins were a tad annoying, but otherwise well behaved.


Then plan now is to order one new cord and perhaps an LED replacement bulb.  I've always imagined the one BF in a treadle base, so the other will probably be the electric portable.

For those of you keeping score at home, yes, that's only six.

The other two were: one Singer 500a missing it's top cover and having spool pin issues. I also get the feeling that I'm going to have to trace all the wiring connections on this it because it doesn't run well when it's first turned on, but once it warms to the task, the speed available increases significantly. This sort of symptom says 'dirty connections' to me, and I haven't taken the time to track each connection or clean and adjust the pedal.  Since it needs parts, I'll tag it and wait.

The last machine was a real surprise: a Thompson Mini 200pw walking foot. Talk about heavy! I cleaned and oiled the machine and wired up a pedal junction and it runs and it sews... and I was surprised to see that it uses a class 15 bobbin. Oddly, I had the machine working and sewing and then I changed out bobbins and now I'm having tension issues. I may have to do a far more careful cleaning. Finding information on this one has been difficult. I had to take a guess at threading it.


And if that wasn't enough... I took on the task of restoring the Star Chamber Cabinet.