Wednesday, October 31, 2018

Small World Mira

 "I like that sticker on the back of your car." I said to the two ladies standing in the garage.
"The WVU sticker?" the one asked.
"Yes, that's where I went to school."
"Me too." she said.
"What part of town did you live in?" I asked.
"Pineview Apartments," she said.
"Now way, I lived in Pineview, right when you pulled in to the office, third floor."
"You couldn't have, because that's where I lived."

Once we sorted it all out we realized that the summer she graduated and moved out...  my two roommates and I moved into the very same apartment. Now that's just weird. Especially when it's thirty some odd years later and I'm standing in a nearly empty garage way across a city that I haven't lived in for two decades. We were all looking down on an old sewing machine that I really didn't need. I'd been saying to myself for quite some time that it might  be nice to stumble upon a Mira... but I wasn't actively looking.

The ad went up on one of the local online classified services and showed several photos of a cabinet and only hints of the green machine within.  The seller's description centered on the unusual furniture design and the many possible repurposes for a mid-century modern, blonde-colored, wooden desk and matching chair that became a part of the desk when not in use. I was excited about the cabinet, the possibility of the machine being a Mira only added intrigue. I called the number. The ad had been online for about seventeen minutes. When a voice answered I asked the dumbest question ever...

Do you still have the sewing machine? (hehe)

I sat on the edge of my seat all the way across town through rush hour traffic. The rational part of me seriously wondered: what in the world was I doing? This was not a machine I needed. I was going to have to find a way to get the cabinet in the house. Furniture would have to be rearranged. This was not going to be easy. I was making a ton of work for myself... all because of a 'collector's' mentality? Seriously?


Readers of this blog might know already that I have this wonderful little Necchi BU that sews up a storm. It's the machine that took well over a week to bring back to life and it has returned the favor by being my best behaving machine.  I took a pretty big chance bringing it home...


That experience encouraged the hunt for a Nova... which I did find. The Nova needed assistance as well, but it became useful in the sewing room. With both of these machines up and running and easily accessible... there really wasn't any practical reason to find a third.  Except that's how they were introduced: first the BU in '48, then the Nova in '53, then the Mira in '54, and after that a major face lift happened across most of the Necchi line. With the exception of the Espiria and Miranda, all the other machines were sleek and curvy.

Practicality had nothing to do with my interests.

It was more about that thing.  Perhaps it was a 'finishing the set' thing and maybe it was the cabinet thing: a Dutch influenced design made to save on space and a little desk when not in use.  As far as I know there is no specific term that identifies this piece.


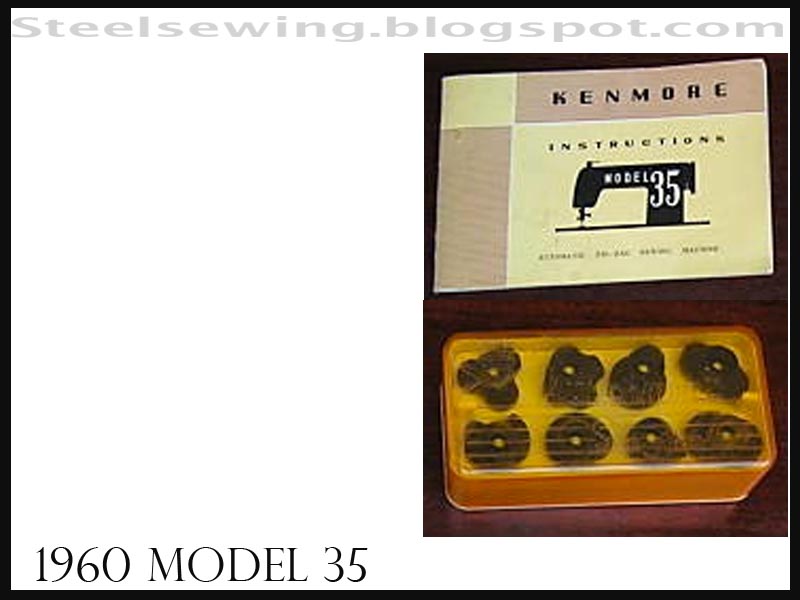
This design was not exactly new or specific to Necchi. A cabinet very similar in shape was offered by Montgomery Wards in the 1940's and Kenmore had it's own version in the 50's, even Pfaff offered what seems to be the exact same piece as the one shown above.


Montgomery Ward


Mid 50's Kenmore


One can also see the design influences from the 1930's
when 'parlor' treadle cabinets became equally compact.

*     *     *

There had been a down pour that forced us all into the garage
and there before me was this beautiful little cabinet
and inside (because I just had to look) was the bonus... a light green Mira. 
It was a two-for, a buy one get one free.
I know right? But I have to rationalize it somehow...


The machine itself was in excellent condition. It wasn't covered in oil or dirt. 
It looked well loved, the hand wheel turned, the needle went up and down.... 
and yet it had a story to tell as well.


It had 'that' plate. Not all Mira's come with it. This motor mount plate was reserved for the Mira machines that were ordered with the Wonder Wheel. If I found a wheel, it would bolt right on!


 The other tell-tale signs of Wonder Wheel are the holes in the zigzag levers.
These are needed for the arms of the wheel to connect.

And yet, with all of this aside and exciting and just about as perfect as it could get...  it was still a vintage sewing machine. To be more specific... it was still a vintage Necchi sewing machine which usually means one thing: check every millimeter of wiring.  Since all the wiring I could see was still green... I knew it was all original.

Below the deck there's a connection that runs from the junction box to the knee control. It's an ingenious two piece affair with a plug on one end so that the machine can be removed from the cabinet without having to disassemble anything. After chasing down all the wires, this was the only piece I found that looked worrisome


The insulation had cracked beyond repair. That gentle curve and sixty plus years of bending every time the machine was rolled up or down had taken its toll. It's the only 'high stress' piece of wire on the entire set up, and even though the pair of wires underneath all that mint green were individually wrapped, it still had to be redone. Not redoing it would have been irresponsible.


 One end of this section was easy to find and unplug inside the cabinet but
the other had to be chased into the motor cover and the junction box underneath.


In just the act of moving the motor assembly to gain access... 
bits of insulation crumbled every which way.
Of course I like to think the timing was perfect, and that this machine
found its way into my shop right when it needed to be fixed.
In truth, it probably could have gone for awhile longer, maybe...


With the contact ends loose... the wires had to be slipped between the deck 
and then unplugged at the other end.


The plug itself was in great shape and it is the kind that can be reused.


It only took a few minutes to cut a correct length of new wire, strip the ends,
crimp on prongs, add a little shrink wrap and then re-attach it all.
The hardest part... was making a little drawing so that I put
all the wires back in the correct order.


And then I reassembled the motor cage and restored it to the deck.


The last minor little issue was some old masking tape and adhesive.


This all slide off pretty quick with little effort and some sewing machine oil.

 
Now I'd like to tell you that the story is over, but it may just be the beginning?

The Mira is clean, oiled, the questionable wiring has been replaced and I've gone so far as to go over the cabinet with two coats of furniture wax. The machine runs, sews, the light works, the two speed switch works... 
what else is there to write about?

How about an email a month later from the seller
saying they just found the box of bits... if I'm interested.
- and this is the picture they sent.


So now I wait for the opportunity to pick up the Wonder Wheel. 
(white box lower right corner)
At this rate I may have to give up vintage sewing machines, 
because I can't imagine a scenario getting any better than this.

 Maybe the lesson I need to take from it is that
I should toss 'practical' out the window a little more often
and just enjoy the adventure.  =)


Friday, October 26, 2018

Un sacco di cucito (A bag of sewing)

It all started (again) with a nondescript photograph near the very end of over a hundred other posted photos found online in regards to a local estate sale:


This sale was in a part of town I've never visited and with a 7am start time in the middle of October, it meant navigating unfamiliar Pittsburgh streets in the dark - and none of that worried me.  Another person might have looked at that picture above and never noticed the bag on the floor. Or if they did notice it and the partial view of the sewing machine, would they have recognized the make and model?


Here's an exploded view. There's only one sewing machine that looks like that: cream and coral two tone, central control dial, top cam door, ventilated front door... I felt it had to be a Necchi Supernova Julia 534. It just had to be.

Maybe?

I had to go find out...

At ten till seven on a very cool mid-October morning there was a short line of people already standing on the stone stairs climbing up to the door of the estate sale. The light in the eastern sky was just beginning to change. I was a little concerned that the one thing that brought me all this way might escape my grasp. (How silly!) When I was finally I waved inside, I stepped into the foyer, turned, went straight up the stairs, scanned the first bedroom floor, and then the second... saw the bag, read the 25 dollar price tag, peeked in to see the white letters: Supernova, lifted up the bag by the handles and headed quickly for the cashier.


I asked her if I could set the bag behind her table for just a moment, and then dashed back inside to grab a Singer Sew Handy 50, nearly complete, in it's original box with case and another 25 dollar tag. I couldn't resist. The amusing thing is that the original price is printed on the cardboard Sew Handy box: $24.99.  So much for inflation!


After an hour drive home and a short nap... I headed downstairs to see just what had I got myself into this time... and sure enough it was indeed a Julia 534. What I didn't know was how filthy the machine would be inside that bag.


For awhile I thought maybe the dried-on icky brown stuff might have been nicotine... but the more I cleaned off the brownish film, the more it began to feel like old, dried-on, oil.


I should say that before I began all the cleaning,  I did check every inch of the wiring, especially underneath and where the wires enter the pedal and junction box (ie: anywhere wire could come in contact with metal). I had also removed the bobbin and bobbin carrier and then carefully read the instruction manual on how to make sure the embroidery settings were not engaged.

For those who don't know, running a Supernova in stitch settings that do not need a cam (straight and zigzag) without disengaging the embroidery mechanism can cause permanent damage to the embroidery unit. This is not a warning you'll find anywhere in the manual. It's a warning handed down by long time Necchi owners.


The next cleaning step for me was as usual, a little sewing machine oil on a cotton rag. Once the surface filth came loose I went over it again with warm soapy water and a sponge. In the case of this machine, and because of the really tight spaces around all those delicate switches... I bought a pack of inexpensive tooth brushes and followed my work with a dry wad of cotton.


It would take several attempts to dampen and loosen the film on this machine, but eventually it began to look good.


If it was only one oily film on the top surface of the machine, there were a dozen such layers underneath. You can see the difference above. It would all eventually come clean. I carefully propped it up on it's side (being paranoid not to damage the plastic thread spool pins on the back). The brown film acted more and more like old oil.


This was another time where I went for a cotton rag and denatured alcohol. No damage to the paint, or decals, and the work went quickly as long as I could reach the surfaces. The change was more dramatic here.

With the machine surfaces cleaned, the wiring checked, and the embroidery mechanism disengaged, I went over  all the oil points again and turned the machine easily by hand. Every night as I closed up the shop I added another drop of oil here and there. It was almost time to see if Julia would sew.

Without returning the bobbin and carrier or threading the machine, I plugged everything in and tested the switches. The light switch has to be in the on position for this machine to work. The light bulb glowed and I tried the pedal and the machine ran, but something odd happened.  I noticed a strange black dust on the deck area in between the feed dog drop lever and the light and motor switches. I knew had carefully cleaned that area, so I cleaned it again, and wondered.... then ran the machine for a moment and more black dust returned. That's when I knew I was going to have to check the belt. I was almost certain it would need a new one.


The belt change became problematic. The first problem were that there were no screws in the balance wheel lock. That didn't stop me from removing the lock, but then the balance wheel did not want to come off. I ended up removing the wheel pulley from the motor shaft to have the belt loose and then spent a day oiling and nudging the balance wheel.


This balance wheel isn't your normal vintage sewing machine one piece unit, it's a two piece affair where the lock washer is riveted into the outside balance wheel half.  Removing the top cover gave me access to the back of the balance wheel assembly and soft taps with a wooden dowel rod and a mallet finally convinced the wheel to move.


When the back half moves, the entire assembly moves with it. It was a slow process; turn the wheel and tap, turn again and tap... more cleaning, more lubrication and TriFlow and then finally the two balance wheel halves came off. I managed to find two matching screw head bolts the correct size and thread for the lock nut.


By now, it was Thursday and I'd brought the machine home on Saturday. I didn't spend all day every day cleaning and working on the Supernova. Most of my efforts were reserved for the early and late hours. It still seamed to me that this was taking a little longer than usual. In retrospect and as I write this, I realize that yes, I have taken my time. There are items on this machine I have never come across before; the two piece wheel, the two speed control, the rumored 'brittle' switches and also the 'push button' needle release. Add all those concerns and a heavy layer of dark film, along with with the care needed to make sure the embroidery unit isn't damaged, and there's little wonder why my work was a little on the slow and cautious side.


Eventually, I had to trust my work and the fifty-plus year-old craftsmanship built into this Italian-made machine. I didn't try everything, but the straight stitch and zigzag stitch were working well. Soon, I'll sit down with the cam sets and see what else it will do. I've been told there's thousands of combinations.

It's not like I needed another sewing machine. For that matter, it's not like I needed another Necchi. I have yet to write a post about the early Necchi BF sitting behind me on a shelf, or a black Nova found forlorn and in need of rewiring from at another estate sale - and there's a mint green Mira as well. (I need to find a wonder wheel!) I have to admit that the Necchi's here are beginning to outnumber any other marquee.

The Supernova's are a challenge. As with any of the more complicated vintage machines they have their strong points and their weak points. On these curved bodied Necchi Supernovas made from 1957 on, there are things that can wear out. The push button needle mount has been known to fail (replaceable with a traditional mount) and occasionally the old rheostat will go bad which means having to rewire the machine and eliminate the dual speed - or some people choose to slip them into a treadle. The one other thing that can go is the tiny little spider gear in the embroidery unit. That can't be fixed, but replacements units can occasionally be found or the entire mechanism can be removed leaving the machine to do straight and zigzag only.  There are lots of options to keep an old Necchi sewing - which can't be said for many of it's competitors built during the same time period. When the timing belt goes on a Pfaff 130 - that's it, it's done - which is not the case with the Necchi.


Saturday, October 20, 2018

1960's Kenmore Sewing Machines 60-69 (WIP)

Here's my attempt at making a visual guide to the Kenmore sewing machines of the 1960's. It is incomplete for several reasons. I couldn't always find a corresponding image for the models that I knew were being offered, and the information available to me appears to be faulty in that many machines and models are just missing. Since this piece is a work in progress, any information that might help fill in the gaps or clear up some of the confusion would be very welcome.


While the 1950's saw many changes for sewing machines and the companies that supplied Sears & Roebuck, 
the next decade would become considerably quieter.
It takes a year or two for it all to settle, but by1961 White no longer supplies machines
and almost all of the 1960's machines are built by Soryu and Maruzen of Japan.
There were very few exceptions:


According to the numbers available to us, the New Process Gear Company of Syracuse New York 
will make the model 120.760 and 120.761 model between 1960 and 1962 before their contract ends.


By1962 sales of the Lady Kenmore model 89 made by Gritzner-Frayer will end as well.

From then on in the suppliers are either Soryo or Maruzen. This makes it a little easier to identify the maker.
It doesn't make it any easier to figure out the model code numbers, and there's a big change in '67 when the numbers went from two or digits to four and eventually more than four.

1960 Kenmore Sewing Machines

1960 Soryu:

Soryu continues with the Model 27 above (148.273 & 148.274)
*I will attempt another post to explain the unusual
Kenmore Class 15 Clones.


New Soryu Model 28 (148.280) above


New Soryu Model 29 above (148.290, 148.291, 148.292)


Soryu made Model 39 (148.392 148.393)


and new Soryu 86 models (148.861)

1960 Maruzen: 

Maruzen supply the Model 35 (158.353)


Maruzen Model 44 (158.442 158.443)


Maruzen introduces the new Model 46 (158.461, 158.462) 


Maruzen Model 47 (158.470, 158.471)


Maruzen Model 48 (158.480)


Maruzen introduces the new Model 50
(158.500)


1961 Kenmore Sewing Machines

1961 Soryu (148):

1n 1961 Soryu (148) offers many models from 1960 with only a slight change in model numbers:
Model 27 (148.273, 148.274)
Model 28 (148.280)
Model 29 (148.292, 148.293, 148.294)
Model 39 (148.394, 148/395)
Model 86 (148.861)

Soryu introduces the following new models for 1961:


Soryu Model 40 (148.400)


Soryu Model 87 (148.870)


Soryu Model 1204 (148.12040)

1961 Maruzen (158):

Maruzen continues production of the model 44 (158.444, 158.445) from 1960 
as well as the model 46 (158.460 158.462) model 47 (158.470, 158.471)
model 48 (158.480) and model 50 (158.500, 158.501, 158.502)


43
(no photo)
Maruzen introduces the new model 43 (158.430)


1962 Kenmore Sewing Machines

1962 would mark the last year for Kenmore sewing machines made by New Process Gear Company of Syracuse New York with the model 76 (120.760 &120.761) and there may still be a final few Gritzner Lady Kenmore model 89's. The sad truth is that the information available does not include any information of the Gritzner machines.

13 models

1962 Soryu (148):

Soryu continues to offer the model 28 (148.280) model 29 (148.294) 
model 40 (148.400) and the 1204 (148.12040)

1962 Maruzen (158):

Maruzen offers the model 43 (158.430) the model 46 (158.463) and 47 (158.470, 158.471)
as well as the model 48 (158.480) and 50 (158.501, 158.503)

34
(no photo)
and introduces the new Maruzen model 34 (158.340, 158.341)


1963 Kenmore Sewing Machines

17 models

1963 Soryu (148):

Soryu continues to make the model 29 (148.294 & 148.295) 
and brings back the 1961 model 87 (148.871 and 148.872)
and continues with the model 148.12040

Soryu introduces the new model 20 (148.200 & 148.210)

and new model 21 (148.210)

1963 Maruzen (158):

In 1963 Maruzen continues to offer the model 34 (158.342) 
the model 43 (158.431, 158.432) the model 43 (158.431, 158.432) 
the model 47 (158.472) the model 48 (158.481) and model 50 (158.504, 158.505)

Maruzen introduces the new model 32 (158.320 and 158.321)


1964 Kenmore Sewing Machines

14 models

Soryu (148):

1964 Kenmore models built by Soryu include a continuance of the following models:
The model 29 (148.294, 148.295) the model 87 (148.871, 148.872) and the 1204 (148.12040)
the model 20 (148.200) and the model 21 (148.210).
Neither company offer a new model in 1964

Maruzen (158):

Mauzen continues producing the model 32 (158.321) model 34 (158.343) model 43 (158.433) model 47 (158.472) and model 48 (158.481) and model 50 (158.504 and 158.505).

Neither company offer a new model in 1964 


1965 Kenmore Sewing Machines

12 models

Soryu (148):

In 1965 Soryu again does not offer a new model and continues to produce the model 20 (148.200) the model 21 (148.210) the model 29 (148.295) and the model 1204 (148.12040)

Maruzen (158):

Although Maruzen offers the model 32 (158.321) model 43 (158.433) and the model 50 (158.505) the company did offer four brand new models in 1965:


New from Maruzen for 1965 is the model 12 (158.120)


Maruzen model 13 (158.130)

Maruzen model 14 (158.140)


Maruzen model 15 (158.150)

and the new Maruzen model 16 (158.160)


1966 Kenmore Sewing Machines

13 models

Soryu (148):

Soryu continues with the model 20 (148.200) and 21 (148.210) the model 29 (148.295, 148.296) 
and continue with the model 1204 (148.12040).
Soryu introduces the new model 23 (148.230, 148.231)

and the new Soryu model 53 (148.530)


Maruzen (158):

Maruzen's offering fro 1966 include the model 12 (158.120, 158.121) 
the model 13 (158.130) and the 43 (158.433)

New for 1966 was the Maruzen model 33 (158.330)


1967 Kenmore Sewing Machines

17 models

Everything you thought you knew about Maruzen and Soryo numbering goes out the window in 1967. For reasons only known to themselves and perhaps Sears... model numbers leap ahead to four digits.

Soryu (148):

Continue into 1967 for Soryu is the model 23 (148.231) model 53 (148.530 148.531) 
and the ever present  1204 (148.12040).

New for 67 is the Soryu model 40 (148.400).

New model 42 (148.420).

Maruzen (158):

Maruzen model numbers are the first ones to go to the new four digit code.
In 1967 they continue to offer the model 13 (158.130)
the model 15 (158.152) the model 16 (158.163) the model 22 (158.221) and the 33 (158.331).

New for 1967 from Maruzen include the following:

 1525
(no photo)
The new Maruzen model 1525 (158.15250 158.15251)

1551
(no photo)
The new Maruzen model 1551 (158.15510)

1581
(no photo)
The new Maruzen model 1581 (158.15810)

1641
(no photo)
The new Maruzen model 1641 (158.16410)

1649
(no photo)
The new Maruzen model 1649 (158.16490)


1968 Kenmore Sewing Machines   

34 models

Soryu (148):

Not to be left behind, Soryu came into 1968 with five new models, 
each stamped with the new four digit model number  

New Soryu Model 1201 (148.12010)

The new Soryu model 1203 (148.12030)

The new Soryu model 1204 (148.12040)

The new Soryu model 1300 (148.13000)

The new Soryu model 1302 (148.13020 148.13021 148.13022)

Maruzen (158):

Maruzen, however, must have been planning for this new four digit model code all along.
They entered 1968 with no less than 19 new models!

New Maruzen model 1200 (158.12000)

1202
(No Photo)
New Maruzen model 1202 (158.12020)

New Maruzen model 1301 (158.13011)


New Maruzen model 1500 (158.15000)


1501
(No Photo)
New Maruzen model 1501 (158.15010)

1600
(No Photo)
New Maruzen model 1600 (158.16000 158.16001)

1650
(No Photo)
New Maruzen model 1650 (158.16500)

1651
  (No Photo)
New Maruzen model 1651 (158.16510)

1652
(No Photo)
New Maruzen model 1652 (158.16520)

1653
(No Photo)
New Maruzen model 1653 (158.16530)


New model 1654 (158.16540)

1700
(No Photo)
New Maruzen model 1700 (158.17000)

New Maruzen model 1701 (158.17010 158.17011)

 1749
(No Photo)
New Maruzen model 1749 (158.17490)

New model 1750 (158.17500 158.17501)


New Maruzen model 1751 (158.17510 158.17511)

New Maruzen model 1752 (158.17520)

1800
(No Photo)
New Maruzen model 1800 (158.18000)

1801
(No Photo)
New Maruzen model 1801 (158.18010 158.18011)

New model 1802 (158.18020 158.18021)


1969 Kenmore Sewing Machines

37 different models

Soryu (148):

In 1960 Soryu continued to offer the 1204 148.12040 the 1300 (148.13000) 
and 1302 (148.13020 148.13021 148.13022) models and added the following:

New Soryu model 1100 (148.11000)

New Soryu model 1101 148.11010


New Soryu model 1206 148.12060


New Soryu model 1207 148.12070

Maruzen (158):

Maruzen again offered the model 1200 (158.12000) 1301 (158.13010) 1500 (158.15000) 1650 (158.16500 158.16501) 1651 (158.16510) 1652 (158.16520) 1654 (158.16540) 1751 (158.17511) 1752 (158.17520) 1801 (158.18011) and 1802 (158.18021, 158.18022)

Maruzen also offered the following new for 1969:

New Maruzen model 1303 (158.13030 158.13031 158.13032 158.13033)

1304
(No Photo)
New Maruzen model 1304 (158.13040)


New Maruzen model 1400 (158.14000)

1503
(No Photo)
New Maruzen model 1503 (158.15030)

New Maruzen model 1601 (158.16010 158.16011)

1701
(No Photo)
New Maruzen model 1701 (158.17010 158.17011)

New Maruzen model 1750 (158.17500 158.17501)

New Maruzen model 1752 (158.17520)

New Maruzen model 1753 (158.17530)

New Maruzen model 1754 (158.17540)


To find the model number on -most- Kenmore sewing machines of this era:

It is usually located just under the lip of the deck as the machine is facing you as if you were to sit and sew.
The number is typically stamped into an ID plate that has been riveted to the casting. I always use caution in rocking the machine back the couple of inches required to read this plate.  Any loose hinge pin or damaged mounting can make this very challenging - if not dangerous. I always make sure I have unplugged the machine and inspected the pivot area of the cabinet or case for structural integrity and loose pins. If there is a locking tab or screw in the front, I'll unlock or unscrew it to allow tilting the machine back just far enough to read the number. The change in weight distribution when tilting an old all-metal machine can cause a portable to slide away and a cabinet to lean.

What do those numbers mean?

There are theories as to why two seemingly identical machines have only slight differences in model numbers. Some say a single digit change between models indicates cabinet or portable, and I've also heard a theory of changing the last digit again because of a new model year.

For example:
The very first model 35 Kenmore would be a 158.350.
It's been suggested that this .350 number indicates it's the first year for the model,
and that the machine would be in a cabinet.
The model 35 with the model number: 158.351
would also be a first year model, but sold as a portable.

The second year of production for that same model 35
would change the last three digits to 158.352 (the cabinet model) and 158.353 (the portable).

Since no one seems to know the truth behind the often confusing model numbers, this theory seems to fit for a few years. Where it gets confusing is that the model 35 predates the model 13. I don't think anyone will ever understand this mystic manner of Kenmore model numbering. If it's not confusing enough, between the two suppliers Soryu and Maruzen one of them may have made the model 13, while the other may have made the 14
and it could have been years apart...

I'm sure that in retrospect no one at Sears, Maruzen or Soryo had any idea that at the time that they
 began something that would continue for well over a decade.

Notes and links:

*trying to sort out all of this information has been an absolute nightmare. I've made an attempt, but I'm sure it's full of errors. Please let me know if information is incorrect. To save on space, only one set of photos for any particular model are offered. Once 1960 is set, I included only photos for the new models. If there are omissions, they are not ones I made knowingly.

The story behind who made all of the Kenmore 15 clones
is as mysterious as the manufacturers of the odd Canadian machines.
Items we will try to cover later. =)

**Addendum: this list of models offered by Sears seems very incomplete. There is no mention of the model 52 or 88, so any information regarding missing models would be most welcome. This list also does not include the various machines sold to Canada under the Kenmore label that were not sold in the US.

Here's a Kenmore Manufacturer List and
perhaps the best updated list of JA/JC numbers currently available online:
http://www.doubleveil.net/zssmp/resources.htm#sears

There are several Kenmore groups online
 I have not yet personally signed up and checked them out
Here are the addys:

io group
https://groups.io/g/VintageKenmoreSew

Yahoo groups
https://groups.yahoo.com/neo/groups/VintageKenmoresSew/info
and
https://groups.yahoo.com/neo/groups/OldKenmoreSewingMachines/info

This isn't the end all of Kenmore Sewing machine identification for the 1960's models,
but perhaps it's a start.