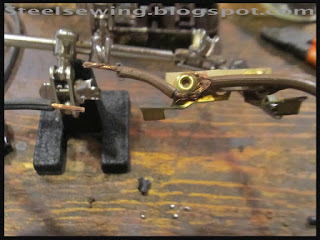
On this particular box the old wires had a last bit of good insulation right at the end where they attach to the copper leads. In a way I found this fortunate because I could cover the old wire, new wire, and solder joint with shrink wrap. The tools I used were: wire cutter/strippers, flux, solder, soldering gun, solder stand, shrink wrap, a butane lighter and new wire.
I made sure to mock up where my hands were going with a hot soldering gun tip and where that tip gets laid down to cool. After setting everything up I gave it a practice run before plugging in the iron. And, as usual, I had a moist sponge anchored down to clean the solder tip.
Since this box includes both the cord plug to the outlet and the pedal cord... I know that these would be considered high wear items and I should use the heavier insulation wire. The norm for this would be AWG 16 gauge with the SPT-2 coating.
I also know that I'm working on a vintage sewing machine power cord, and that one lead is going to run from this junction box to the wall outlet. When I sat down to figure out just how long that cord was going to be I considered several factors.
The length of a power cord can have fractional effects on the amperage supplied to the machine and also, as the power cord length increases so does the possibility of heat build-up. I realize that vintage electric foot pedals can fail and fires have happened. I took all this into consideration and made the power cord a reasonable length, and no longer. I am usually in the habit of unplugging my VSM after every use, but I also use a fused outlet with a switch. This is what I will have to do until I get the chance to replace vintage pedals with new electronic ones.


No comments:
Post a Comment